A flashlight shines light through a piece of film with an smiley face picture on it. The light emerging from the film (Object) then passes through a Lens and hits a screen (Image) located 1 meter away from the film. Slide the lens back and forth along the optical axis to attempt to form a focused image on the screen. You can select different focal lengths for the lens. Negative focal length represents a concave (diverging) lens. Positive focal length represents a convex (converging) lens.


Object Height = 5cm
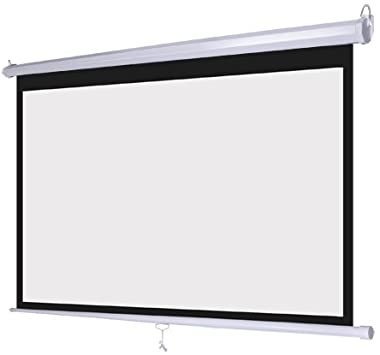
When you have an Image formed that you want to measure the height of, take a screenshot of the entire projection screen with the Image on it so you can measure the Image height by pixels.
1. WINDOWS: use Windows-Shift-S to open a screen capture option where you can draw a box around the projection screen to capture and copy it to the computer's clipboard. MAC: use Command-Shift-4 to draw a box around the projection screen to put a screenshot file on your Desktop. Then double click that file to open it and select "copy" from the Edit menu to put it in the computer's clipboard.
2. Go to rapidtables.com/web/tools/pixel-ruler.html and use Ctrl-V or Cmd-V to paste your screenshot onto the page.
3. The white portion of the projection screen is 27.3cm tall. Measure the screen height in pixels by drawing a line down the center of it (going straight through the middle of the Image) and reading the pixels displayed in the box. You can now use this as a scaling factor (# of px per cm) to calculate the actual height of the Image (hi) on the screen by converting the Image height measurement in pixels to its height in centimeters. Measurements should be made down the full the diameter of the smiley face measured between opposite inner edges of its circle line. The height of the Image should be given a positive value if it is upright or a negative value if it is inverted (upside down).
The original Object height (ho) is provided above.